Getting Started iOS
Introduction
BaasBox is a tool that allows you to quickly build a back end for you application. You can install it on your local machine (ideal for development and testing) or your own server. It comes with an SDK that simplifies the integration of your mobile with BaasBox. To complete this tutorial you need a Mac with the following tools installed:
- Xcode 4.6.3
- JVM 1.6+
In this tutorial you will learn how to integrate BaasBox into an existing application. The application is called DearDiary and it’s a personal diary. You can download the starter project from here: DearDiary-starter.zip
Unzip and run the project to check it works as expected. It’s made of two components: a table view and a detail view. The first shows a list of memos. Tap the “+” button to add a new one.
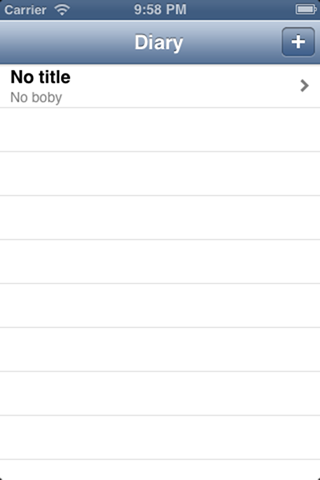
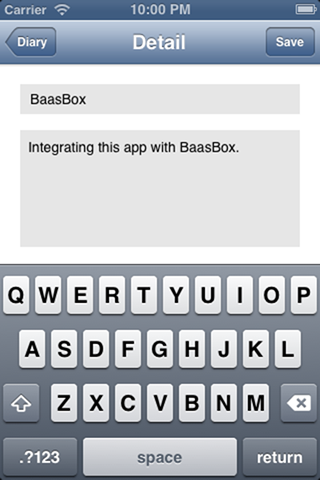
You will see the updated note in the list. Feel free to add further notes. The app is pretty simple and works as expected. It has a problem though. When you delete it (e.g. reset the simulator or uninstall it from the device) all the memos that you have saved are gone and there is no way to restore them. Wouldn’t it be cool if we could save them on a back end? That’s exactly what we are going to do in this tutorial.
Installing BaasBox
The first step is to install BaasBox. For sake of simplicity we will show how to install it on a local machine. You will see that’s very easy. Download the latest version of BaasBox from here. Unzip the file, open Terminal, go to the directory unzipped, type “./start” and hit return. BaasBox is now running on your local machine. To test visit the following link: http://localhost:9000/ and you should see the following screen.
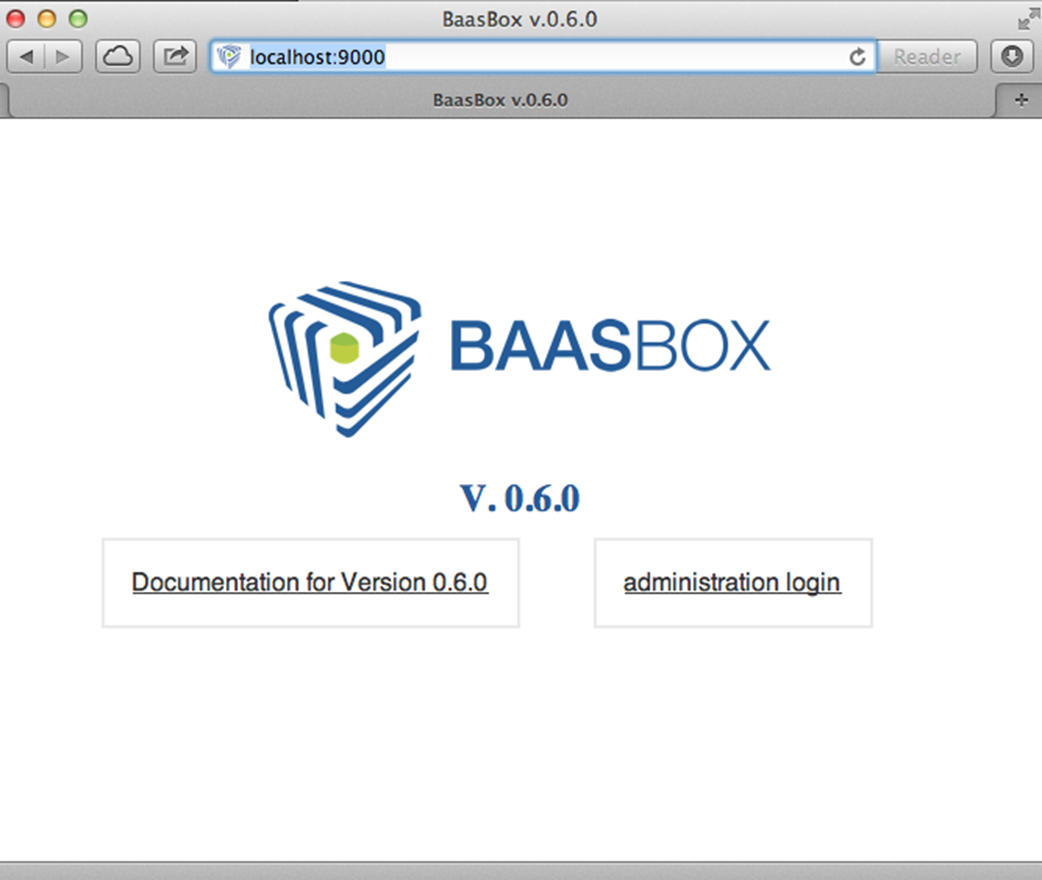
This means BaasBox is correctly running. If you are working on a BaasBox running on a remote server, ask your system administrator which is the URL of the console. Tap the administrator login button. This will show the following.
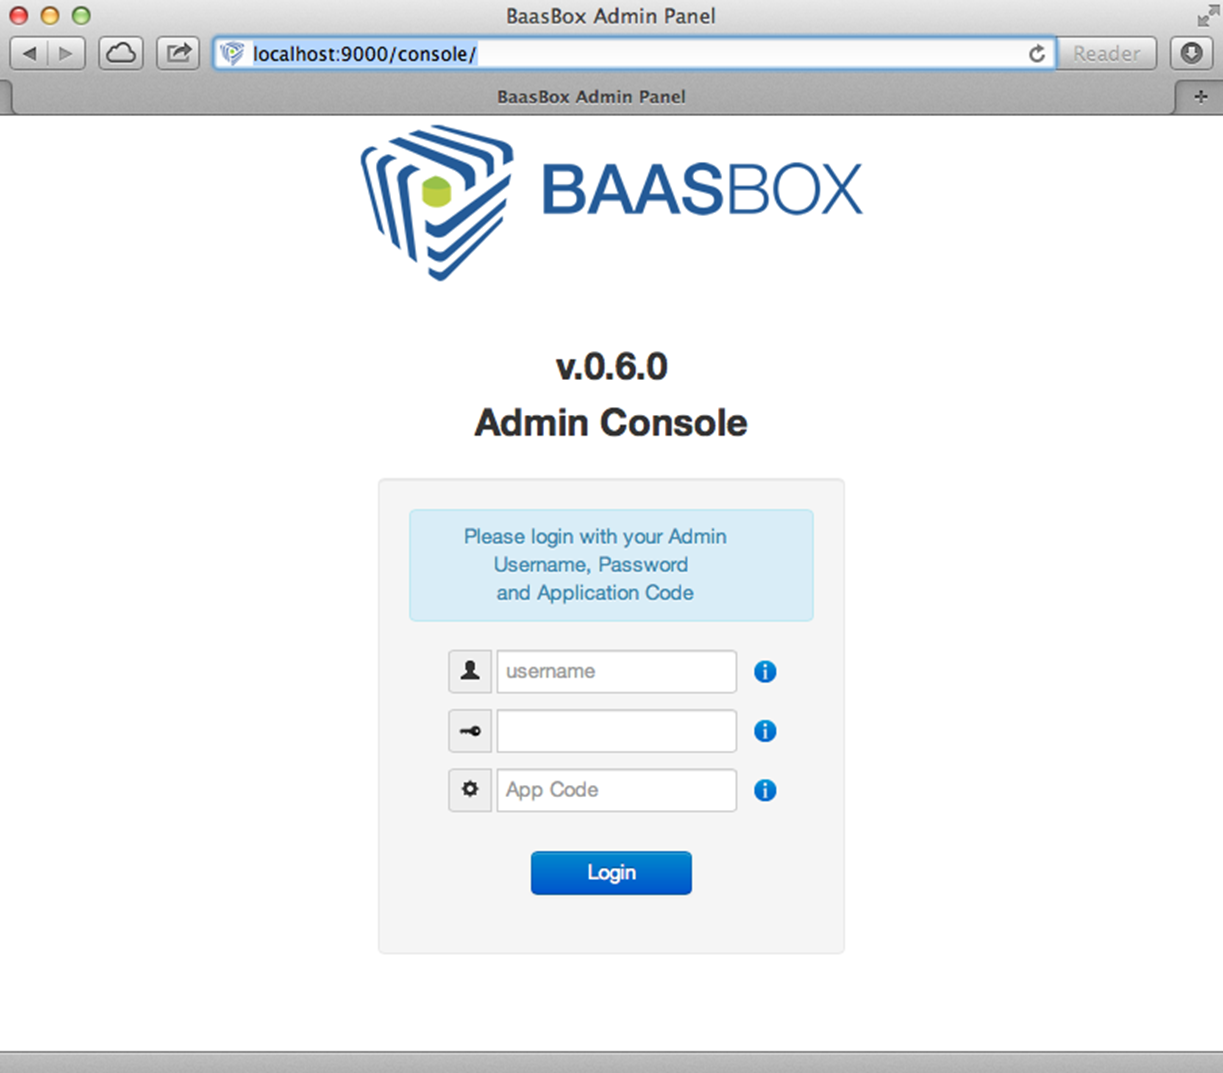
If you are running BaasBox on a local machine the default the admin credentials are:
- username: admin
- password: admin
- app code: 1234567890
If you have testing against an instance running on a server, contact the system administrator to get these credentials.
Once you are logged in as administrator you you will see the BaasBox console like this.
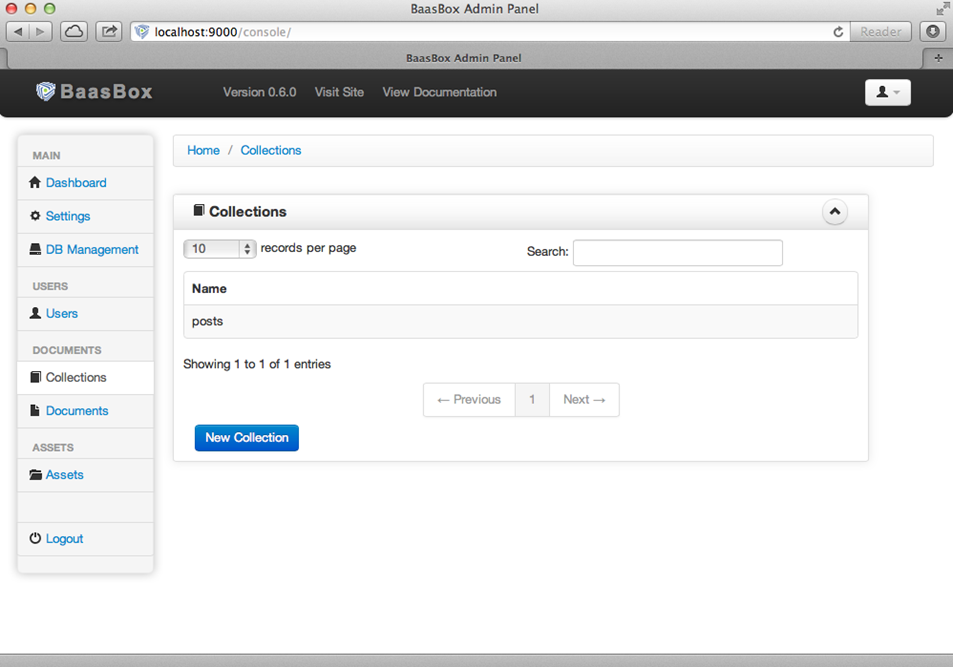
The next step is to create a collection.
Creating a collection
A collection is a bucket to hold objects of the same class. We are going to create a new one to hold the posts of the DearDiary app. Click the “Collections” button on the left side menu, tap the “New Collection” button, enter “posts” and click the Save button. You will end up in this situation.
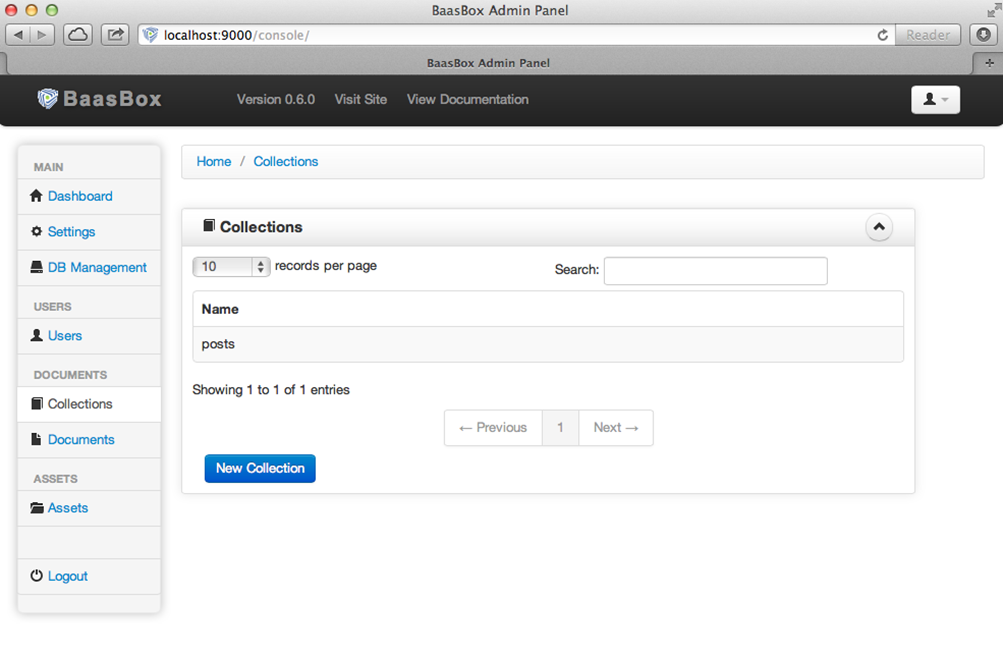
Now the back end is ready to store custom objects in the newly created collection. Let’s move on to integrate the SDK in your project.
Importing the iOS SDK
Download the SDK from here, and unzip the file. Drag the extracted folder onto the root of the starter project.
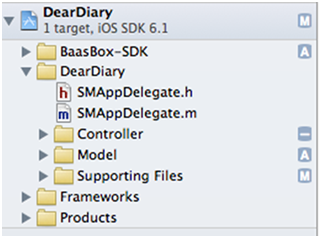 <== The project navigator should now look like this.
Since we are going to use the BaasBox SDK in different files we suggest to import it globally. Open the DearDiary-Prefix.pch file and import the BAAClient header as follows.
#import <Availability.h>
#ifndef __IPHONE_4_0
#warning "This project uses features only available in iOS SDK
4.0 and later."
#endif
#ifdef __OBJC__
#import <UIKit/UIKit.h>
#import <Foundation/Foundation.h>
#import <SystemConfiguration/SystemConfiguration.h>
#import <MobileCoreServices/ MobileCoreServices.h>
#import "BAAClient.h" // < added import statement
#endif
After this the BaasBox methods will be available throughout the project, with no need of further import statements. Now let’s review the current data model.
Reviewing the Model
The current data model is pretty simple. It’s made of a class SMPost which had two fields: title and body. Those hold the data for each instance of an entry in the application. In this step we need to “BaasBoxify” the data model, meaning that the current model (SMPost) has to adhere to the generic model class of the BaasBox SDK. This will allow CRUD operations on every instance of SMPost. Open SMPost.h and make the class extend BAAObject like this.
@interface SMPost : BAAObject
...;
@end
Next, open SMPost.m and implement initWithDictionary: as follows.
(instancetype) initWithDictionary:(NSDictionary *)dictionary
{
  self = [super initWithDictionary:dictionary];
  if (self) {
        _postTitle = dictionary[@"postTitle"];
        _postBody = dictionary[@"postBody"];
   }
return self;
}
This is the method that initializes an instance of post given a dictionary. We suggest to name the keys of the dictionary exactly with the same names of the properties of SMPost. Finally you have to implement the collectionName method as follows.
(NSString *)collectionName {
    return @"document/posts";
}
This is the path to the method called on the server side. Under the hood the iOS SDK will make a call to localhost:9000/document/posts to execute CRUD operations on posts. After these two steps the old data model is now BaasBox-compliant, so let’s move on to authentication.
Authentication
The started project already includes the class SMLoginViewController. This is a component that allows both login and signup. Let’s integrate is in the application. First make sure the end point and the app code are correct. Open BAAClient.m and update the value BAAEndPointUrl and BAAAppCode with the appropriate values. Open SMMasterViewController.m and change viewWillAppear: as follows.
(void)viewWillAppear:(BOOL)animated {
        [super viewWillAppear:animated];
        BAAClient *client = [BAAClient sharedClient];
        if (client.isAuthenticated) {
                NSLog(@"Logged in");
                [SMPost getObjectsWithCompletion:
                            ^(NSArray *objects, NSError *error) {
                        _posts = [objects mutableCopy];
                        [self.tableView reloadData];
                }];
        } else {
                NSLog(@"need to login");
                SMLoginViewController *loginViewController =
                    [[SMLoginViewController alloc]
                    initWithNibName:@"SMLoginViewController"
                                bundle:nil];
                [self.navigationController
                    presentViewController:loginViewController
                                    animated:YES
                                  completion:nil];
                }
}
This piece of code will load posts stored on the server when the user is logged in or show the login view controller when if user has been authenticated. To load objects from the back end you can call getObjectsWithCompletion: on any class extending BAAObject, as SMPost does. This will return an array of objects of the same class. In our example we store the returned value and we reload data in the table view. If no user has logged in we display the login view controller. Whenever you need to find out if somebody is logged in on a device you can use the following code.
BAAClient *client = [BAAClient sharedClient];
client.isAuthenticated
The method isAuthenticated will return a boolean value that you can use to update the user interface accordingly. The class SMLoginViewController includes just graphic elements like the following.
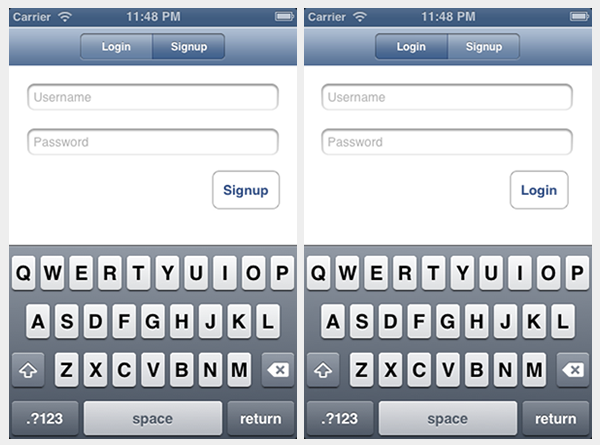
We will now hook them up with BaasBox actions. Open SMLoginViewController.m and change the login method like this.
(IBAction) login {
NSLog(@"login");
BAAClient *client = [BAAClient sharedClient];
[client
   authenticateUsername:self.loginUsernameField.text
        withPassword:self.loginPasswordField.text
      completionHandler:^(BOOL success, NSError *e) {
            if (success) {
                NSLog(@"user authenticated %@",
                        client.authenticatedUser);
                [self
                dismissViewControllerAnimated:YES
                                  completion:nil];
        } else {
                NSLog(@"error in logging in %@",
                      e.localizedDescription);
        }
}];
This shows how to authenticate a user against the BaasBox back end. Now implement the signup method like this.
(IBAction) signup {
        NSLog(@"signup");
        BAAClient *client = [BAAClient sharedClient];
        [client
        createUserWithUsername:self.signupUsernameField.text
                andPassword:self.signupPasswordField.text
             completionHandler:^(BOOL success, NSError *e) {
                    if (success) {
                        NSLog(@"user created %@",
                                client.authenticatedUser);
                        [self
                           dismissViewControllerAnimated:YES
                                              completion:nil];
                        }
                        } else {
                                NSLog(@"error: %@", e);
                        }
                }];
}
Notice that in both cases you will need a username and a password. The back end will return an authentication token that is automatically stored by the SDK and will be used for subsequent API calls that need authentication. The SDK will NOT store in any form the password entered by the user. Now it’s time to store newly created posts on the server.
Storing data on the server
The application does not store data on the server yet. Let’s fix it now. Open SMMasterViewController.m and change the implementation of createNewPost: like this.
(void)createNewPost:(id)sender {
  if (!_posts) {
        _posts = [[NSMutableArray alloc] init];
  }
  SMPost *p = [[SMPost alloc] init];
  p.postTitle = [NSString stringWithFormat:@"No title %i",
 _posts.count ];
  p.postBody = @"No boby";
  [SMPost saveObject:p
        completion:^(SMPost *post, NSError *error) {
                if (error == nil) {
                        NSLog(@"created post on server %@", post);
                        [_posts insertObject:post atIndex:0];
                                NSIndexPath *indexPath =
                                        [NSIndexPath indexPathForRow:0
                                                           inSection:0];
                                [self.tableView
                                        insertRowsAtIndexPaths:@[indexPath]
                        withRowAnimation:UITableViewRowAnimationAutomatic];
                 } else {
                        NSLog(@"error in saving %@", error);
                }
}];
Every time the user taps the “+” button a new note will be created and sent to the back end. You can call saveObject:withCompletion: on every object extending the BAAObject class. In the block you just check out for the presence of an error and update the UI accordingly. In out case, when the save is successful we insert the new element in the list populating the table view. When the user taps a post on the iPhone he can change it by means of the detail view controller. Let’s modify it to store updates on the server.
Updating data on the server
Open SMDetailViewController.m and change the savePost: method as follows.
(void) savePost:(id)sender {
        self.post.postTitle = self.titleField.text;
        self.post.postBody = self.bodyTextView.text;
        [SMPost saveObject:self.post
            completion:^(id object, NSError *error) {
                if (error == nil) {
                        NSLog(@"object saved");
                        self.post = object;
                        [[NSNotificationCenter defaultCenter]
                          postNotificationName:@"POST_UPDATED"
                                        object:nil];
                        [self.navigationController
                                popViewControllerAnimated:YES];
                }else {
                        NSLog(@"error in updating %@", error); }
                }
        }];
}
Notice that we are using the same saveObject:completion: method as before, even if the object has already been created and store on the server. The SDK will internally handle the right API call. It does not matter if the object is created for the first time or is already stored on the back end: whenever you want to save it just call saveObject:completion: and handle the response.
Test the application
Now you are ready to test the new version of DearDiary. Build and run as usual and you will see the login screen, because no user has been authenticated previously. Moreover, besides admin, there is no user on the back end so tap the “Signup” tab, enter a new username and password and tap the button. Notice that after the signup is successful the newly created user is already logged in and you can start creating new posts right away. Tap on the “+” button to add a new note. It will have the default values “No title” and “No body”. Now open the console in the browser (http://localhost:9000/console if you are running on a local machine) and click the “Documents” button on the left menu. Select the “posts” collection from the dropdown menu and you will see the new note created as follows.
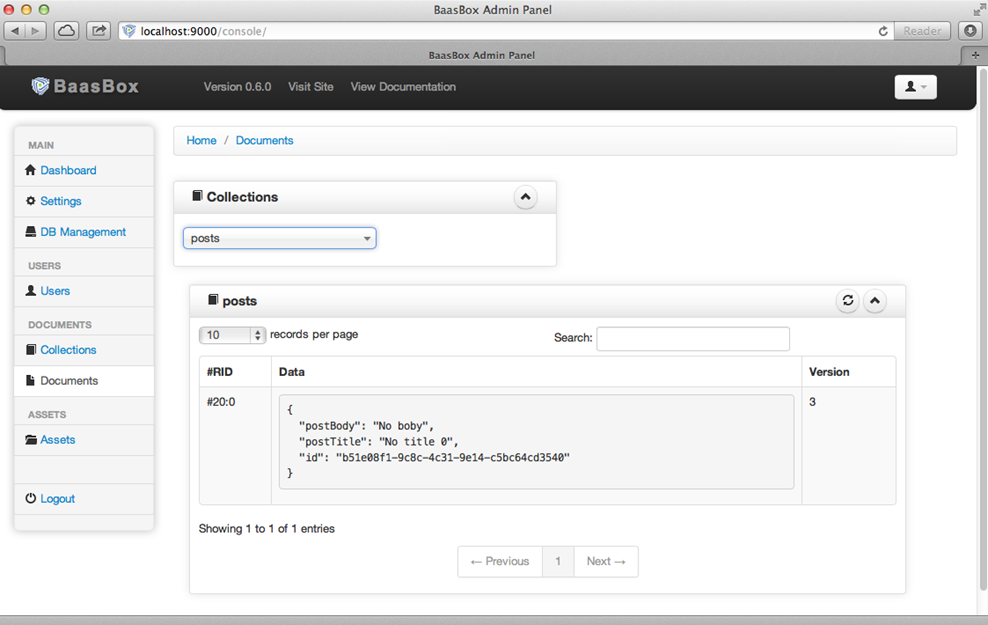
Great, you have saved your first post on the back end! Feel free to play with new notes or by changing titles and contents check how they are stored on the back end. Assuming that so far you have run the example on the simulator you could run it on a real device and see how the posts created by a given users are correctly loaded on that as well.
Where to go from here
There are a few ways in which you can continue this tutorial. Here are some suggestions:
- allow the deletion of a post
- load posts in a paginated way
To find out more about additional methods available in the SDK check out the User Guide Here.